Sunday, August 21, 2016

Dewalt 14.4 Volt Teardown

When I first bought my dewalt drill, I got a great deal in my opinion. I got the drill, charger, case, bit set, and 2 batteries for $100. That was about 3 years ago. Well, one of the batteries finally dies on me. So I decided to take it apart and take a look before trashing it.


So here's the battery. Lightly used over the past few years I'd say. I noticed it didn't hold much of a charge and marked the bottom with a piece of tape since it was going bad. One day it finally held no charge at all.


Here's the bottom and model number DW9094.


Once you remove a few torx screws on the top, you're in.


The battery pack is what I expected. A bunch of single cells in series to get to the 14.4 volts needed. The top and bottom of the pack had some cardboard and tape to keep it together as more of a structure.

Once the cardboard is removed, you can see the series hookup for the batteries.


I clipped all of the connections and tested each cell for voltage. I expected maybe a few dead cells and some with a few bits of charge left since it hadn't been that long since I last tried to charge it. But all of the betteries registed no voltage. In a way that makes ssense since this was a series hookup though. If one cell died completely, that would break the circuit and no cells would be getting a charge.


So I decided to keep the cells since it'sl likely some may still be good. Though honestly, probably not good enough to do anything with. The battery case though, that may have some use. I may look in to putting some lithium cells with safety ciruitry in it. There's a lot of space in there to try and use.


Sunday, August 14, 2016

3D Printed Rope Cutter

I bought 1000 feet of parachute cord and wanted a built in cutter where I mounted it. So I designed a quick tool in TinkerCad. I had two blade to choose from to use, a standard box cutting blade and a flat scraping blade. Turns out they are close in size so I just made it so you could use wither blade.

Here's a Thingiverse link to it.


Two screws to mount and it's done. Just pull the rope through, wrap it around the bottom prong and guide it in to the blade slot. This allows you to put tension on the line and cut it with a quick swipe or two.

Wednesday, August 10, 2016

Remote IR Signals


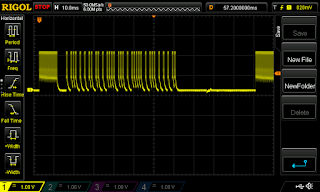
I'm looking in to possibly reverse engineering remotes so I can reproduce signals with an Arduino. It would be pretty cool to do this in an automated fashion but that may be a lot more work than it's worth. Plus I need to look in to getting an IR receiver. Anyways, having an Oscilloscope is nice to see these types of things.

"UP" Arrow Key
"DOWN" Arrow Key
A Difference In Frequencies Between The Screenshots